Running any organization or a startup can be a very daunting process. We require loads of technical resources like physical hardware, compute power(ram and memory), and other vital components.
With the emergence of Cloud Computing, we are now not restricted to physical resources. We can start an Amazon ec2 instance to run multiple servers/machines for our organization without worrying about cost and hardware requirements.
Let us see how to start an Ubuntu server using an Amazon EC2 instance.
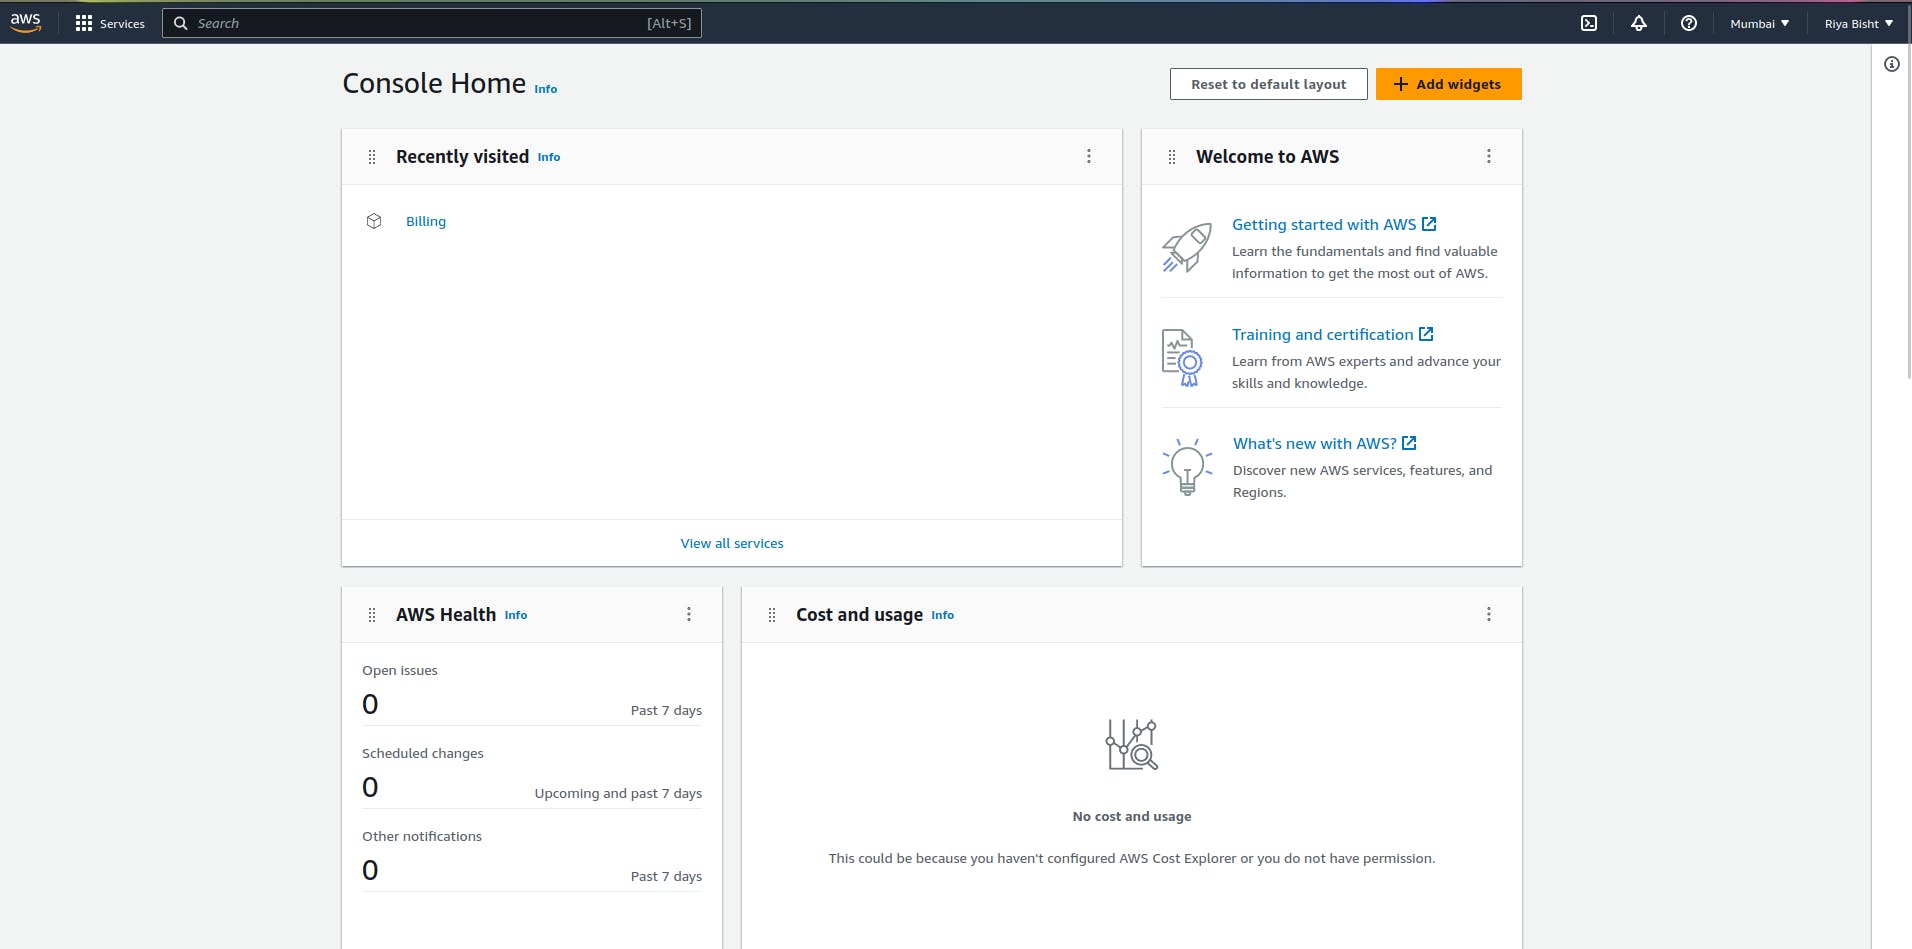
Step 1: Go to AWS Console, you will see the screen like this-
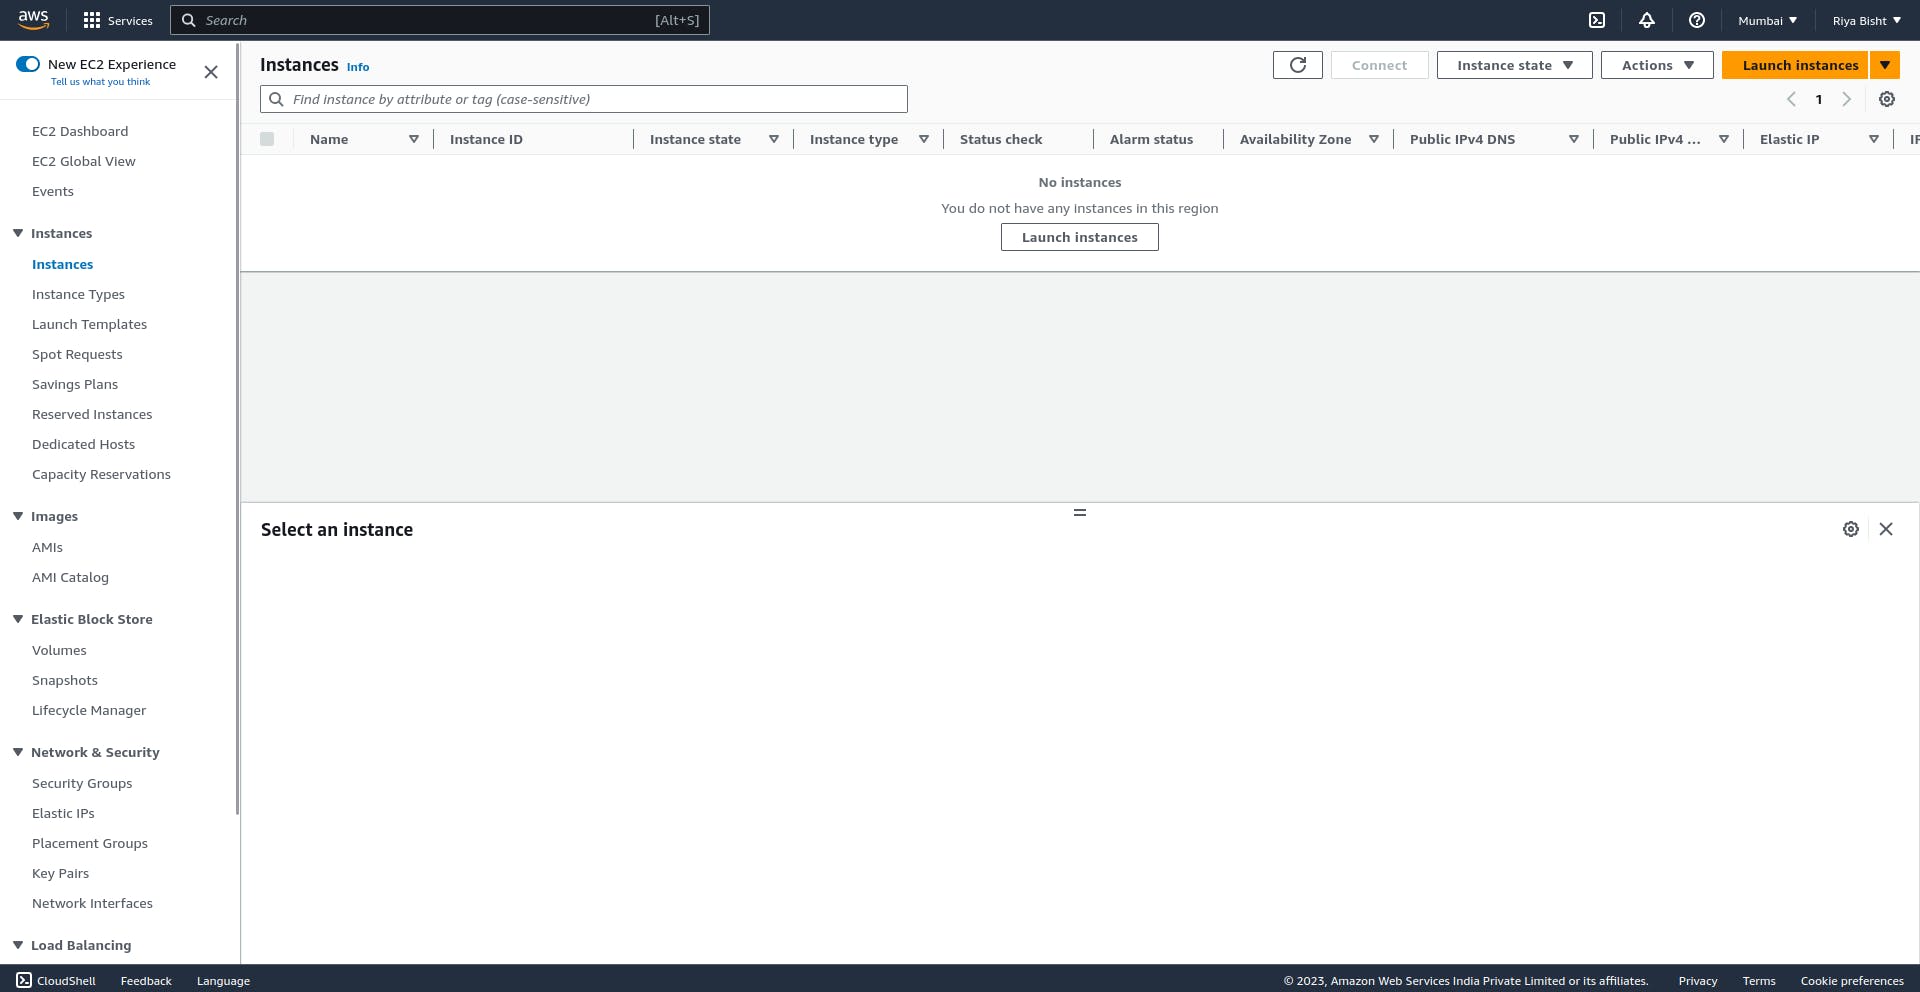
Step 2: On the search bar, type EC2 and then select it. You will see this screen where you have to go to Instances.

Step 3: Currently, no instances are being created. Click on Launch Instances.
Step 4: Fill in the information like instance name, let's keep it ubuntu server.
In Application and OS Images (Amazon Machine Image), choose the image you want to use. For now, we are selecting Ubuntu.

Now, you can choose any version of the image as per your requirements. Here, I am choosing the free tier eligible one, the latest "ubuntu 22.04 LTS version".
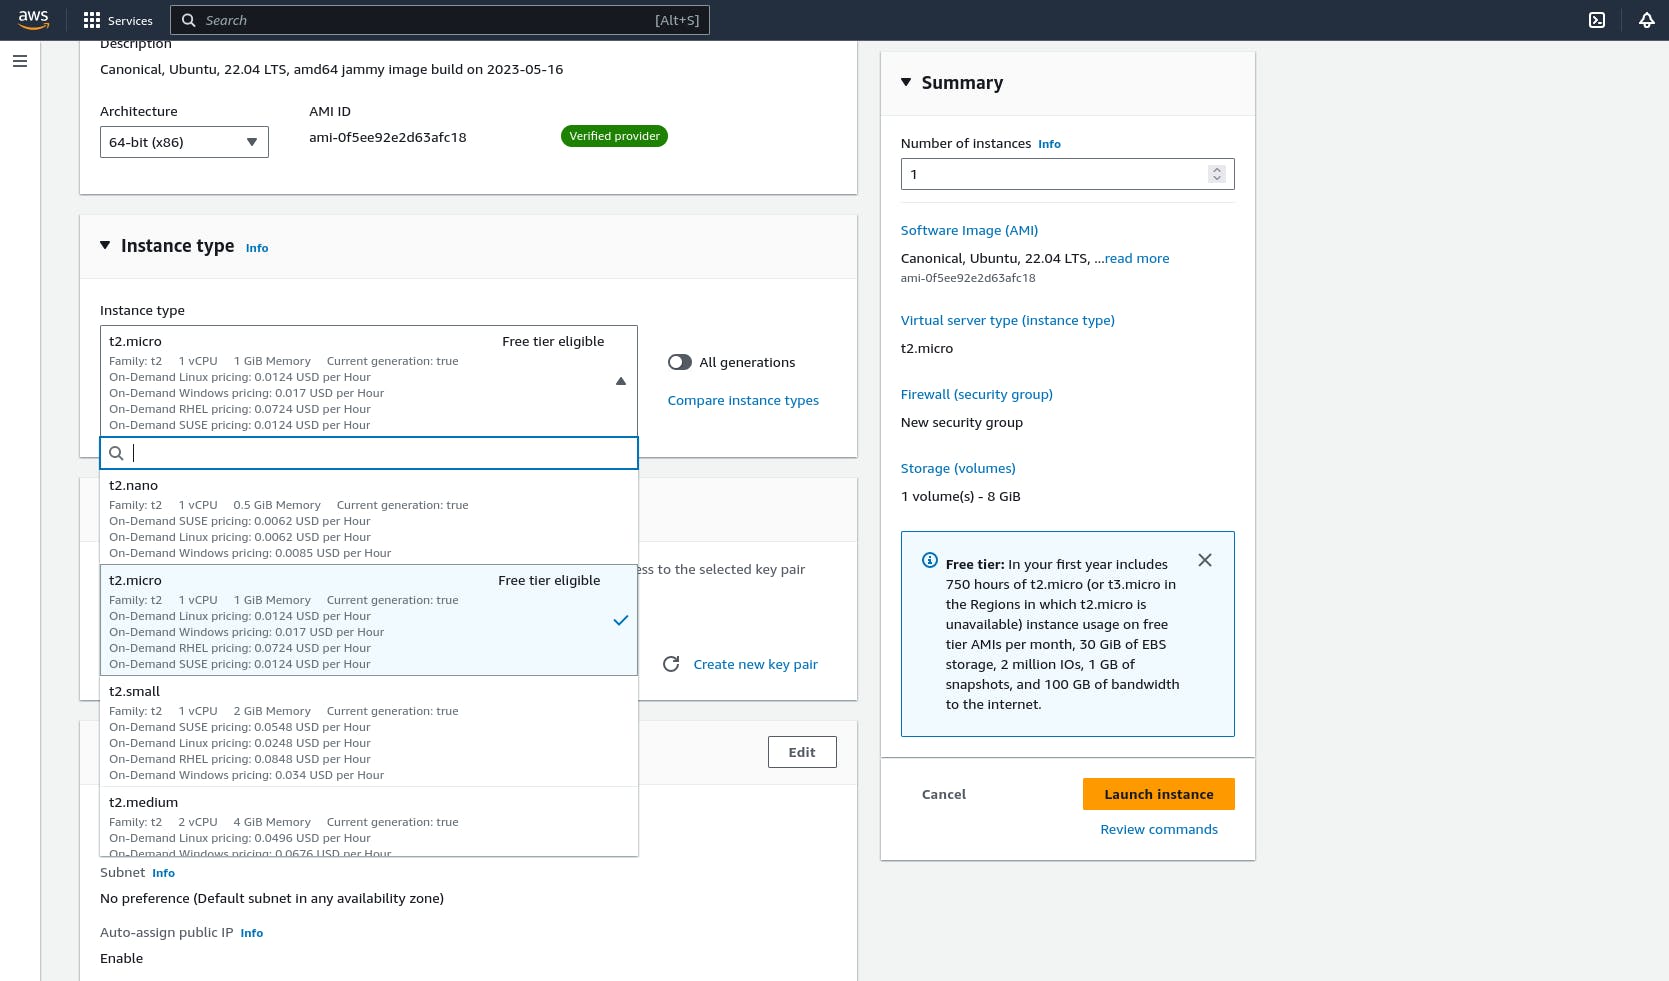
Step 5: You can choose any Instance type but they will cost you so for experiment purposes you can go with the free tier version.
Step 6: Key pair (login) - It is recommended to create a key pair if you want to remotely access your server because without the key anyone can access your server.
As I have no existing key pair, I am creating a new one:
Enter the key pair name and key pair type- RSA, there are two file formats for the key pair:.pem - When you log in to the server via a MacOS or Linux machine
.ppk - If you are doing it via Windows
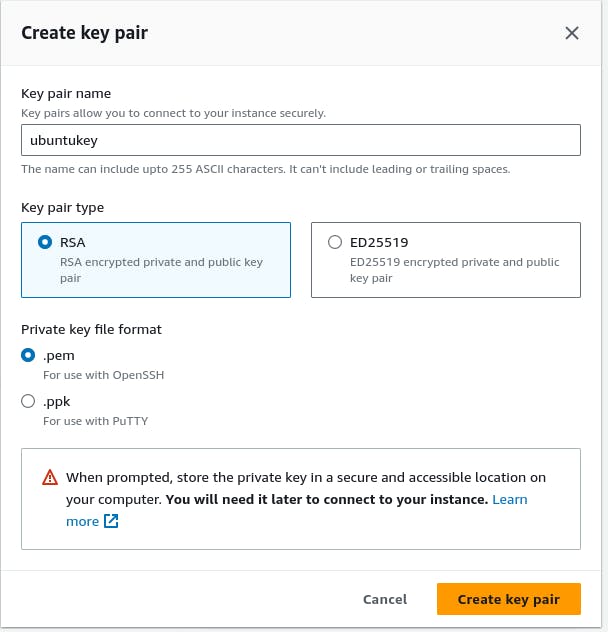
Clicking on the create key pair button downloads the key pair file. Keep it safe because it will help you to log in to your server later.
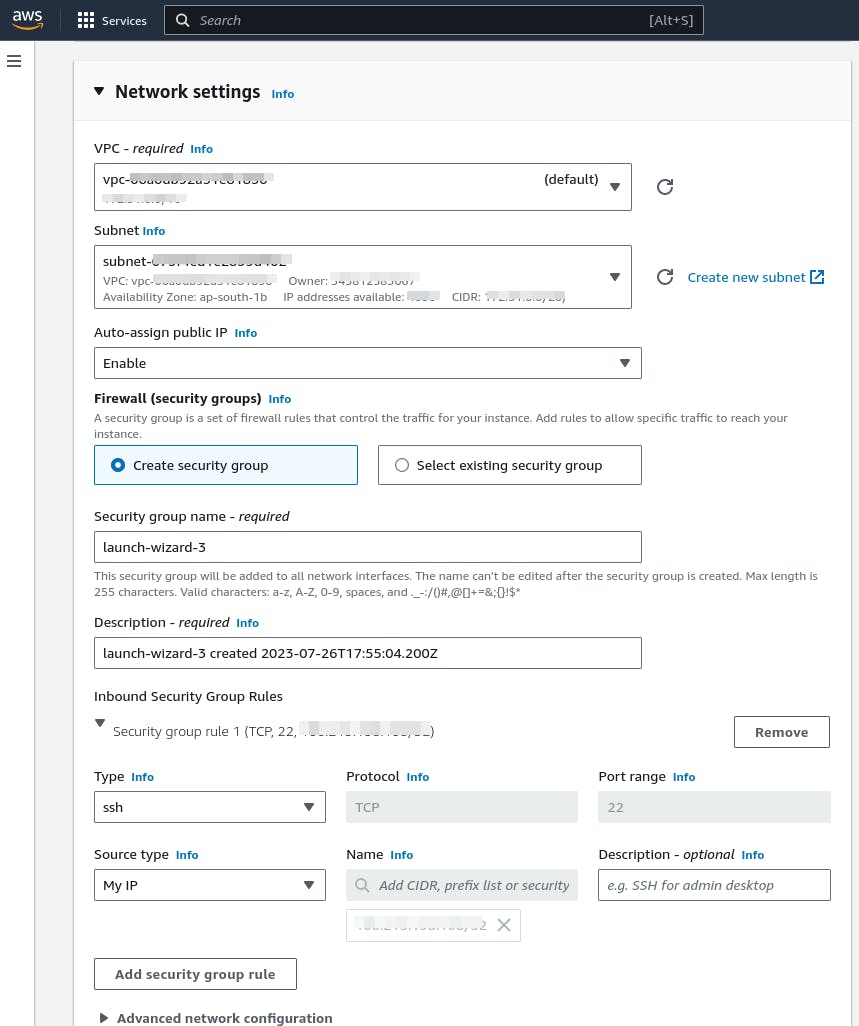
Step 7: Under Network settings set the values as per your need by clicking on the Edit button. Select the vpc, subnet, create a security group then under Inbound Security Group Rules, allow the ssh type and choose My IP(only your machine will be allowed to access that server).
By choosing Anywhere as an option is not secure because then anyone can access your server from any machine though they will require a key to access it.
Step 8: You can increase the storage if you want but we are good with the default for this demonstration. Moreover, you can choose the number of instances. Right now we are creating only one, you can have more than one instance running at the same time.
Under the summary option, you can view the specifications of the server.
Final step: Click on Launch Instance

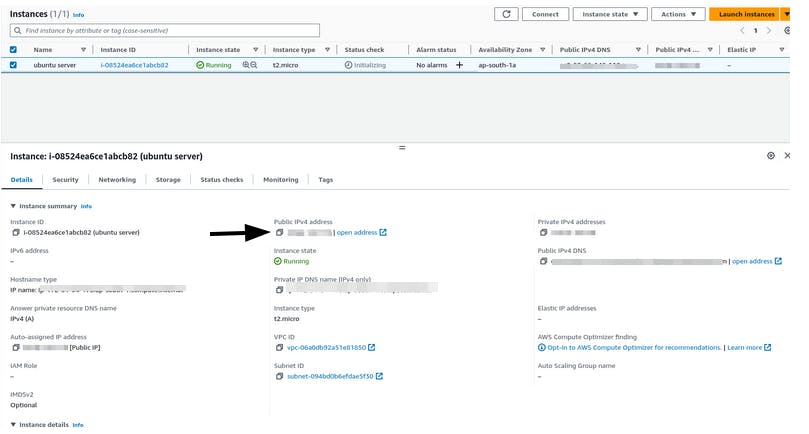
Move to the Instance page. Our Ubuntu instance has been created and it's running currently as shown by Instance state .

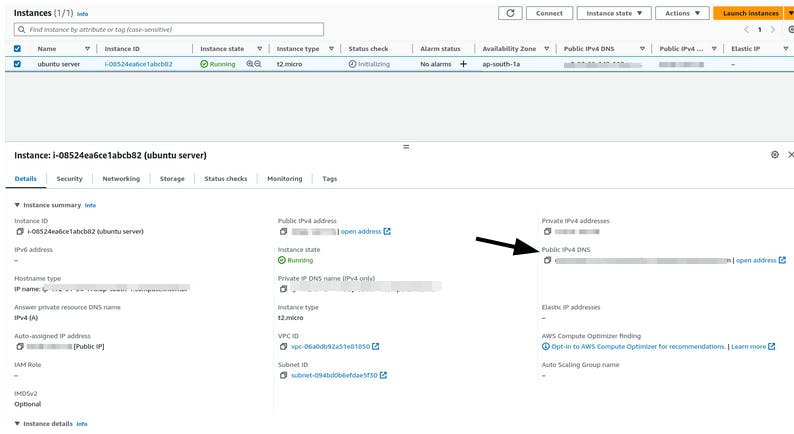
Select ubuntu-server and copy the public IPv4 Address.
Remote Access To Amazon EC2 Server
Using puTTY application-
Step 1: Open the puTTY application.
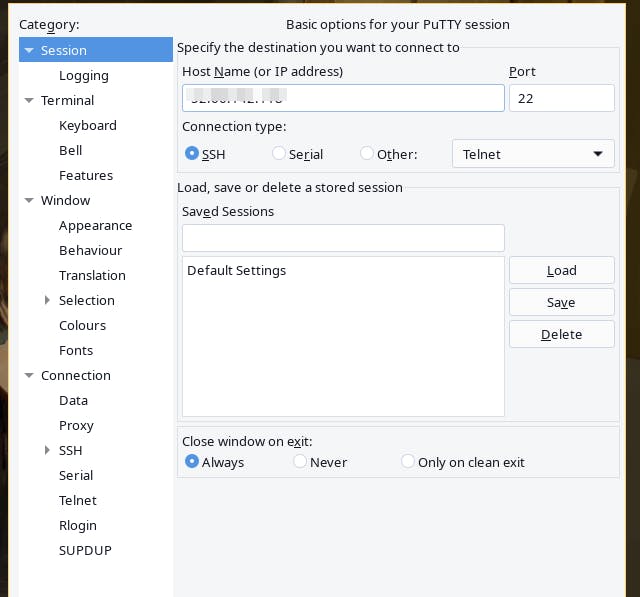
Enter the hostname(IP), and select SSH connection type on Port 22.
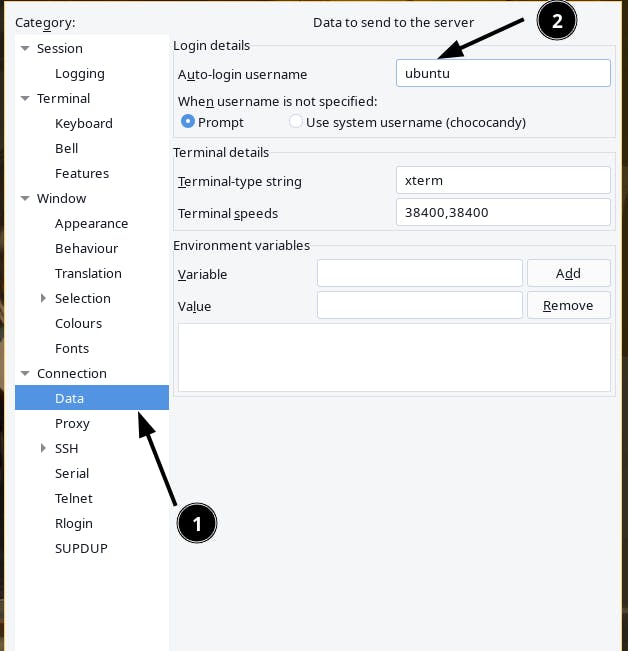
Step 2: Move to Data and type ubuntu as a username.
Step 3: Move to SSH, select Auth, and then select Credentials. Click on the Browse button. A dialog box appears, select the private key file one that you downloaded while creating an instance.

Step 4: Move to Session. Enter ubuntuserver under Saved Sessions and click on Save.
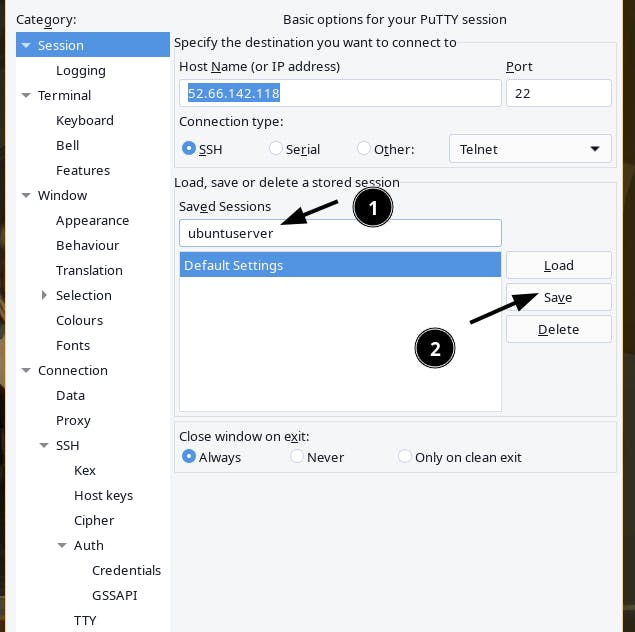
Step 5: Select the ubuntu server and click on Open.
Alternative method:
Using ssh terminal command-
Step 1: Move to Instances and after selecting the ubuntu server instance, copy the Public IPv4 DNS .
Step 2: Install the ssh utility on your computer(for me, Arch Linux)sudo pacman -S openssh
Step 3: Move to the directory where your private key pair is stored and run the command chmod 400 keypair-filename.pem to get the read permissions.
Step 4: Run sudo ssh -i keypair-filename.pem instance-username@ubuntu-instance-public-IPv4DNS
If you do not know the instance username then you may check the default instance usernames given here - docs.aws.amazon.com/AWSEC2/latest/UserGuide..

Tada! now you can remotely access your Amazon ec2 instance via puTTy or terminal ssh utility.
